Custom From Address
Overview
You can make your emails look more professional by sending them with your own from address. The press releases, news and all other material distributed to your lists would look like they had been sent directly from your domain and at the same time reduces the risk of your emails being marked as spam.
1. Email Settings
Note: The following instructions are for our new version of Custom From Address launched in June 2021. The new vesion fully supports signing emails from your company domain using DMARC which improves deliverability and reduces the chance of emails ending up in spam folders.
If you have activated Custom From Address before June 2021, we suggest that you migrate to our new version by clicking "Reset e-mail settings" and then following the guide below to set up Custom From Address again.
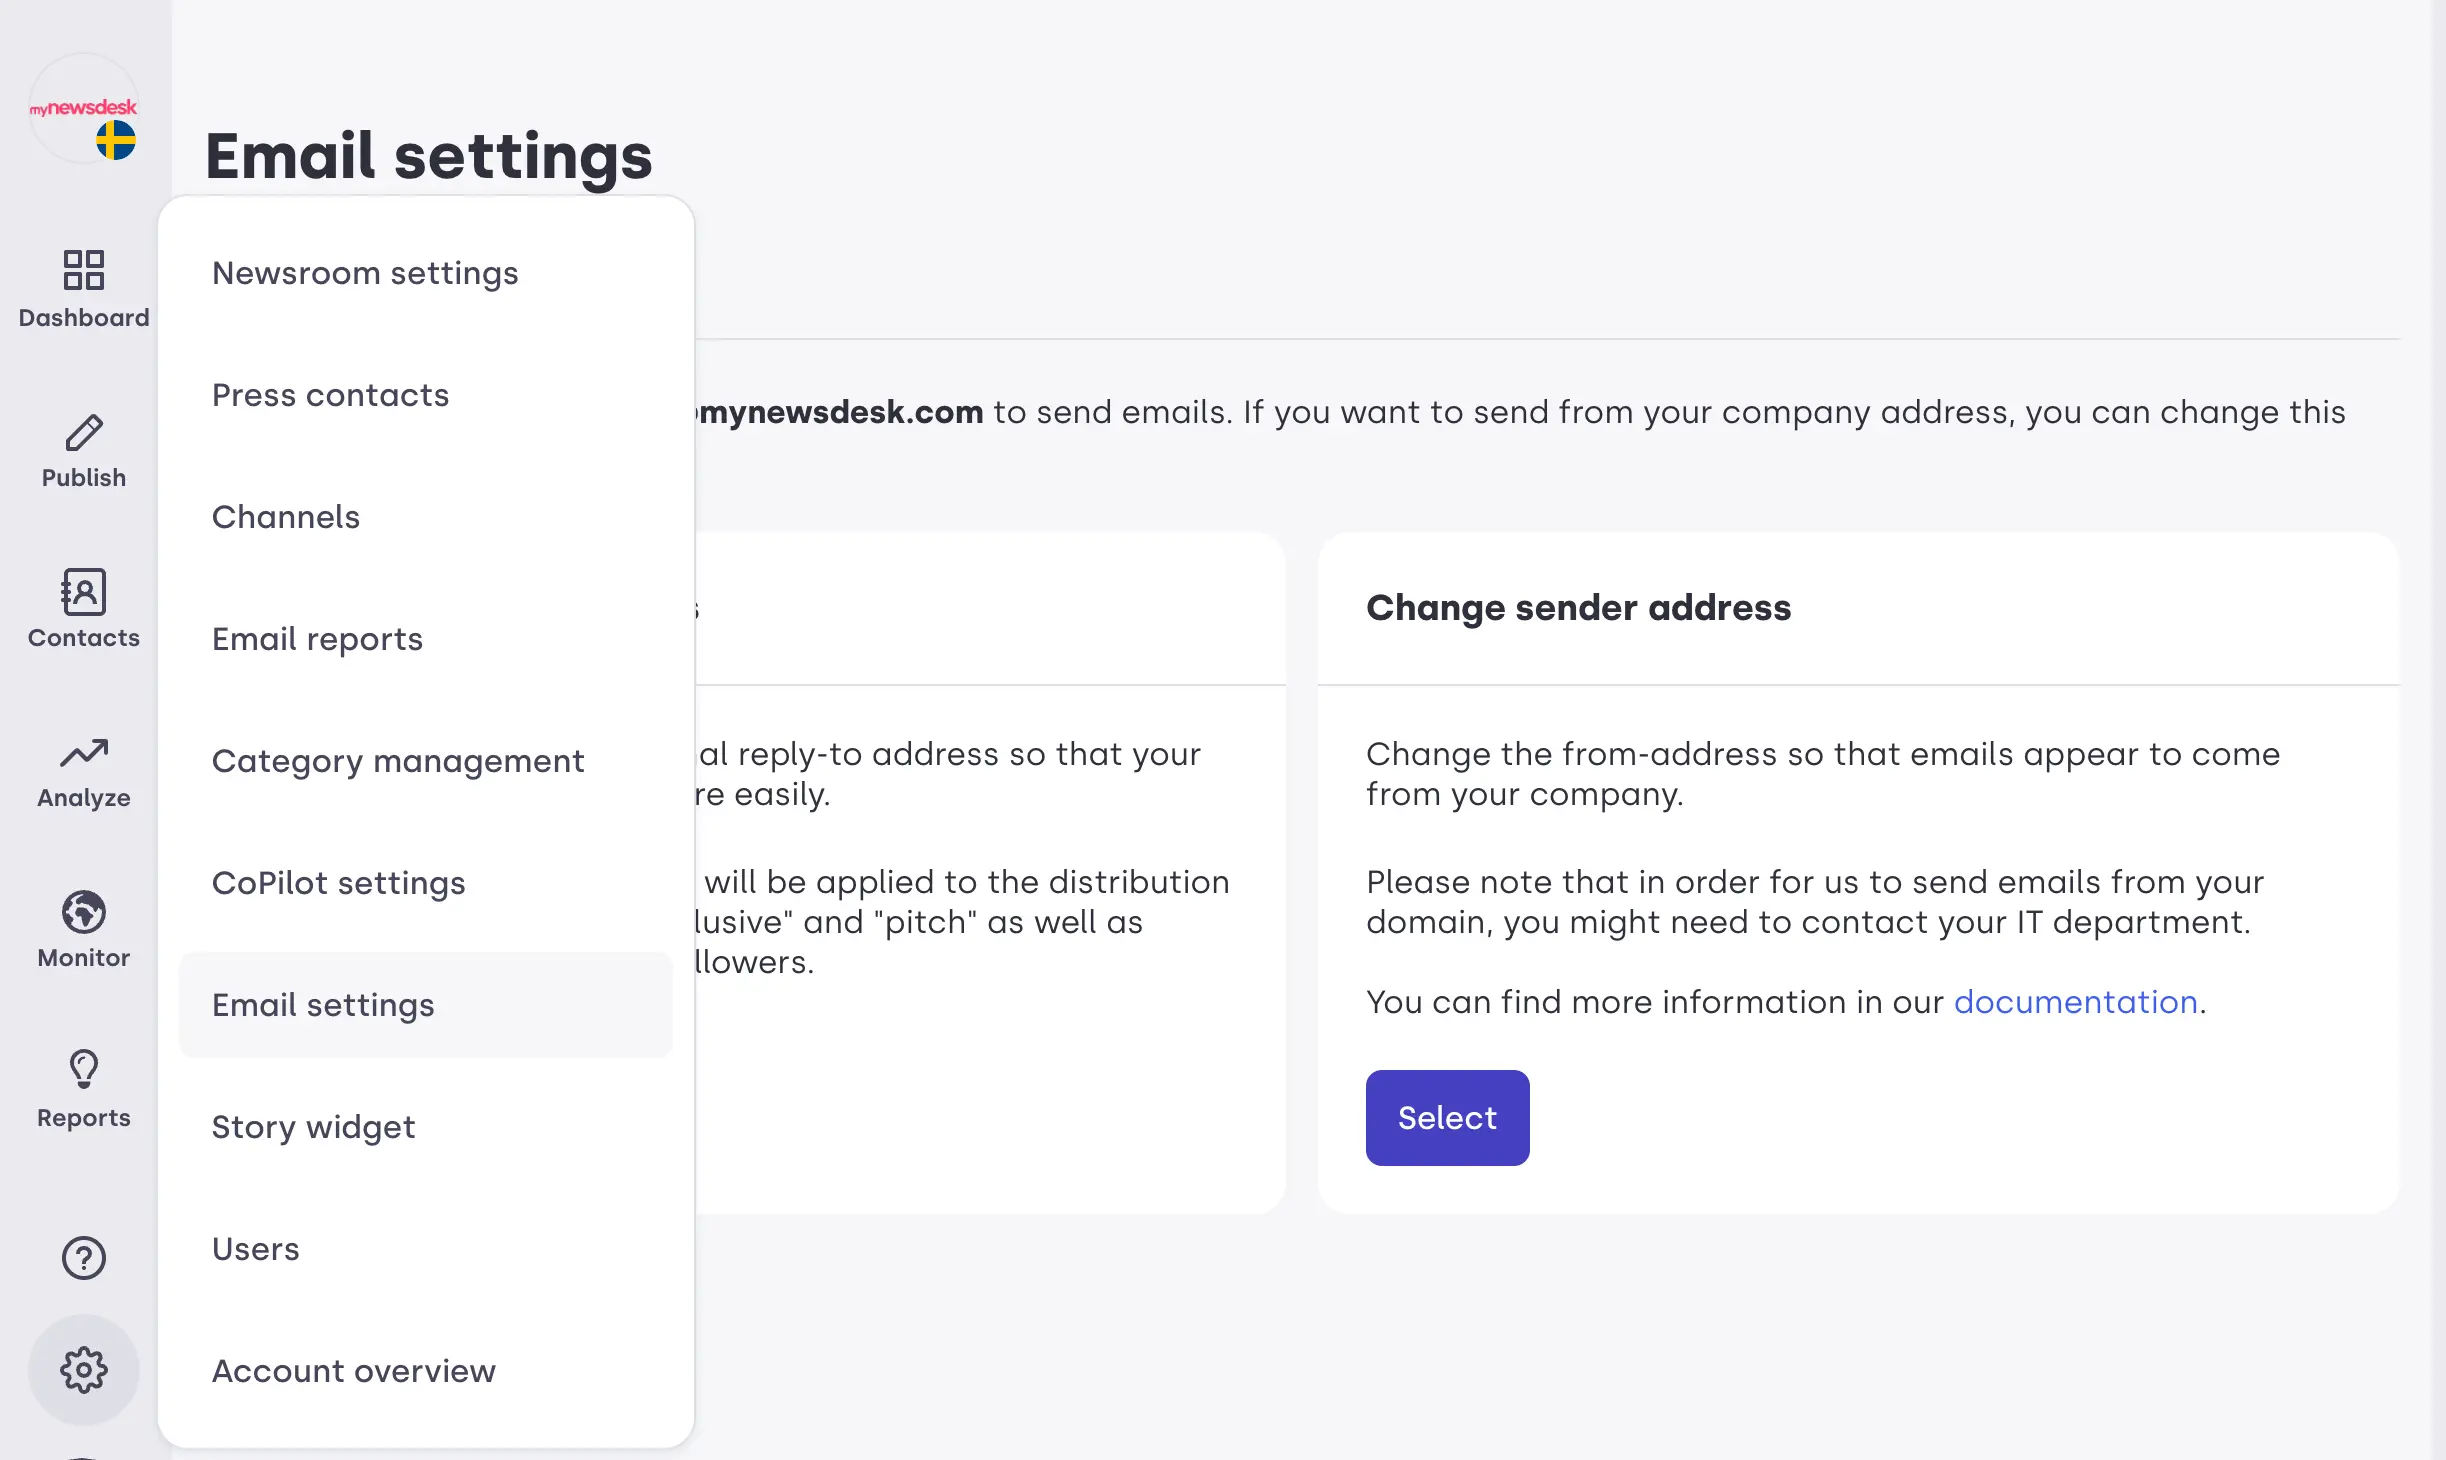
In Email Settings, select “Change sender with DNS” and enter the email address:

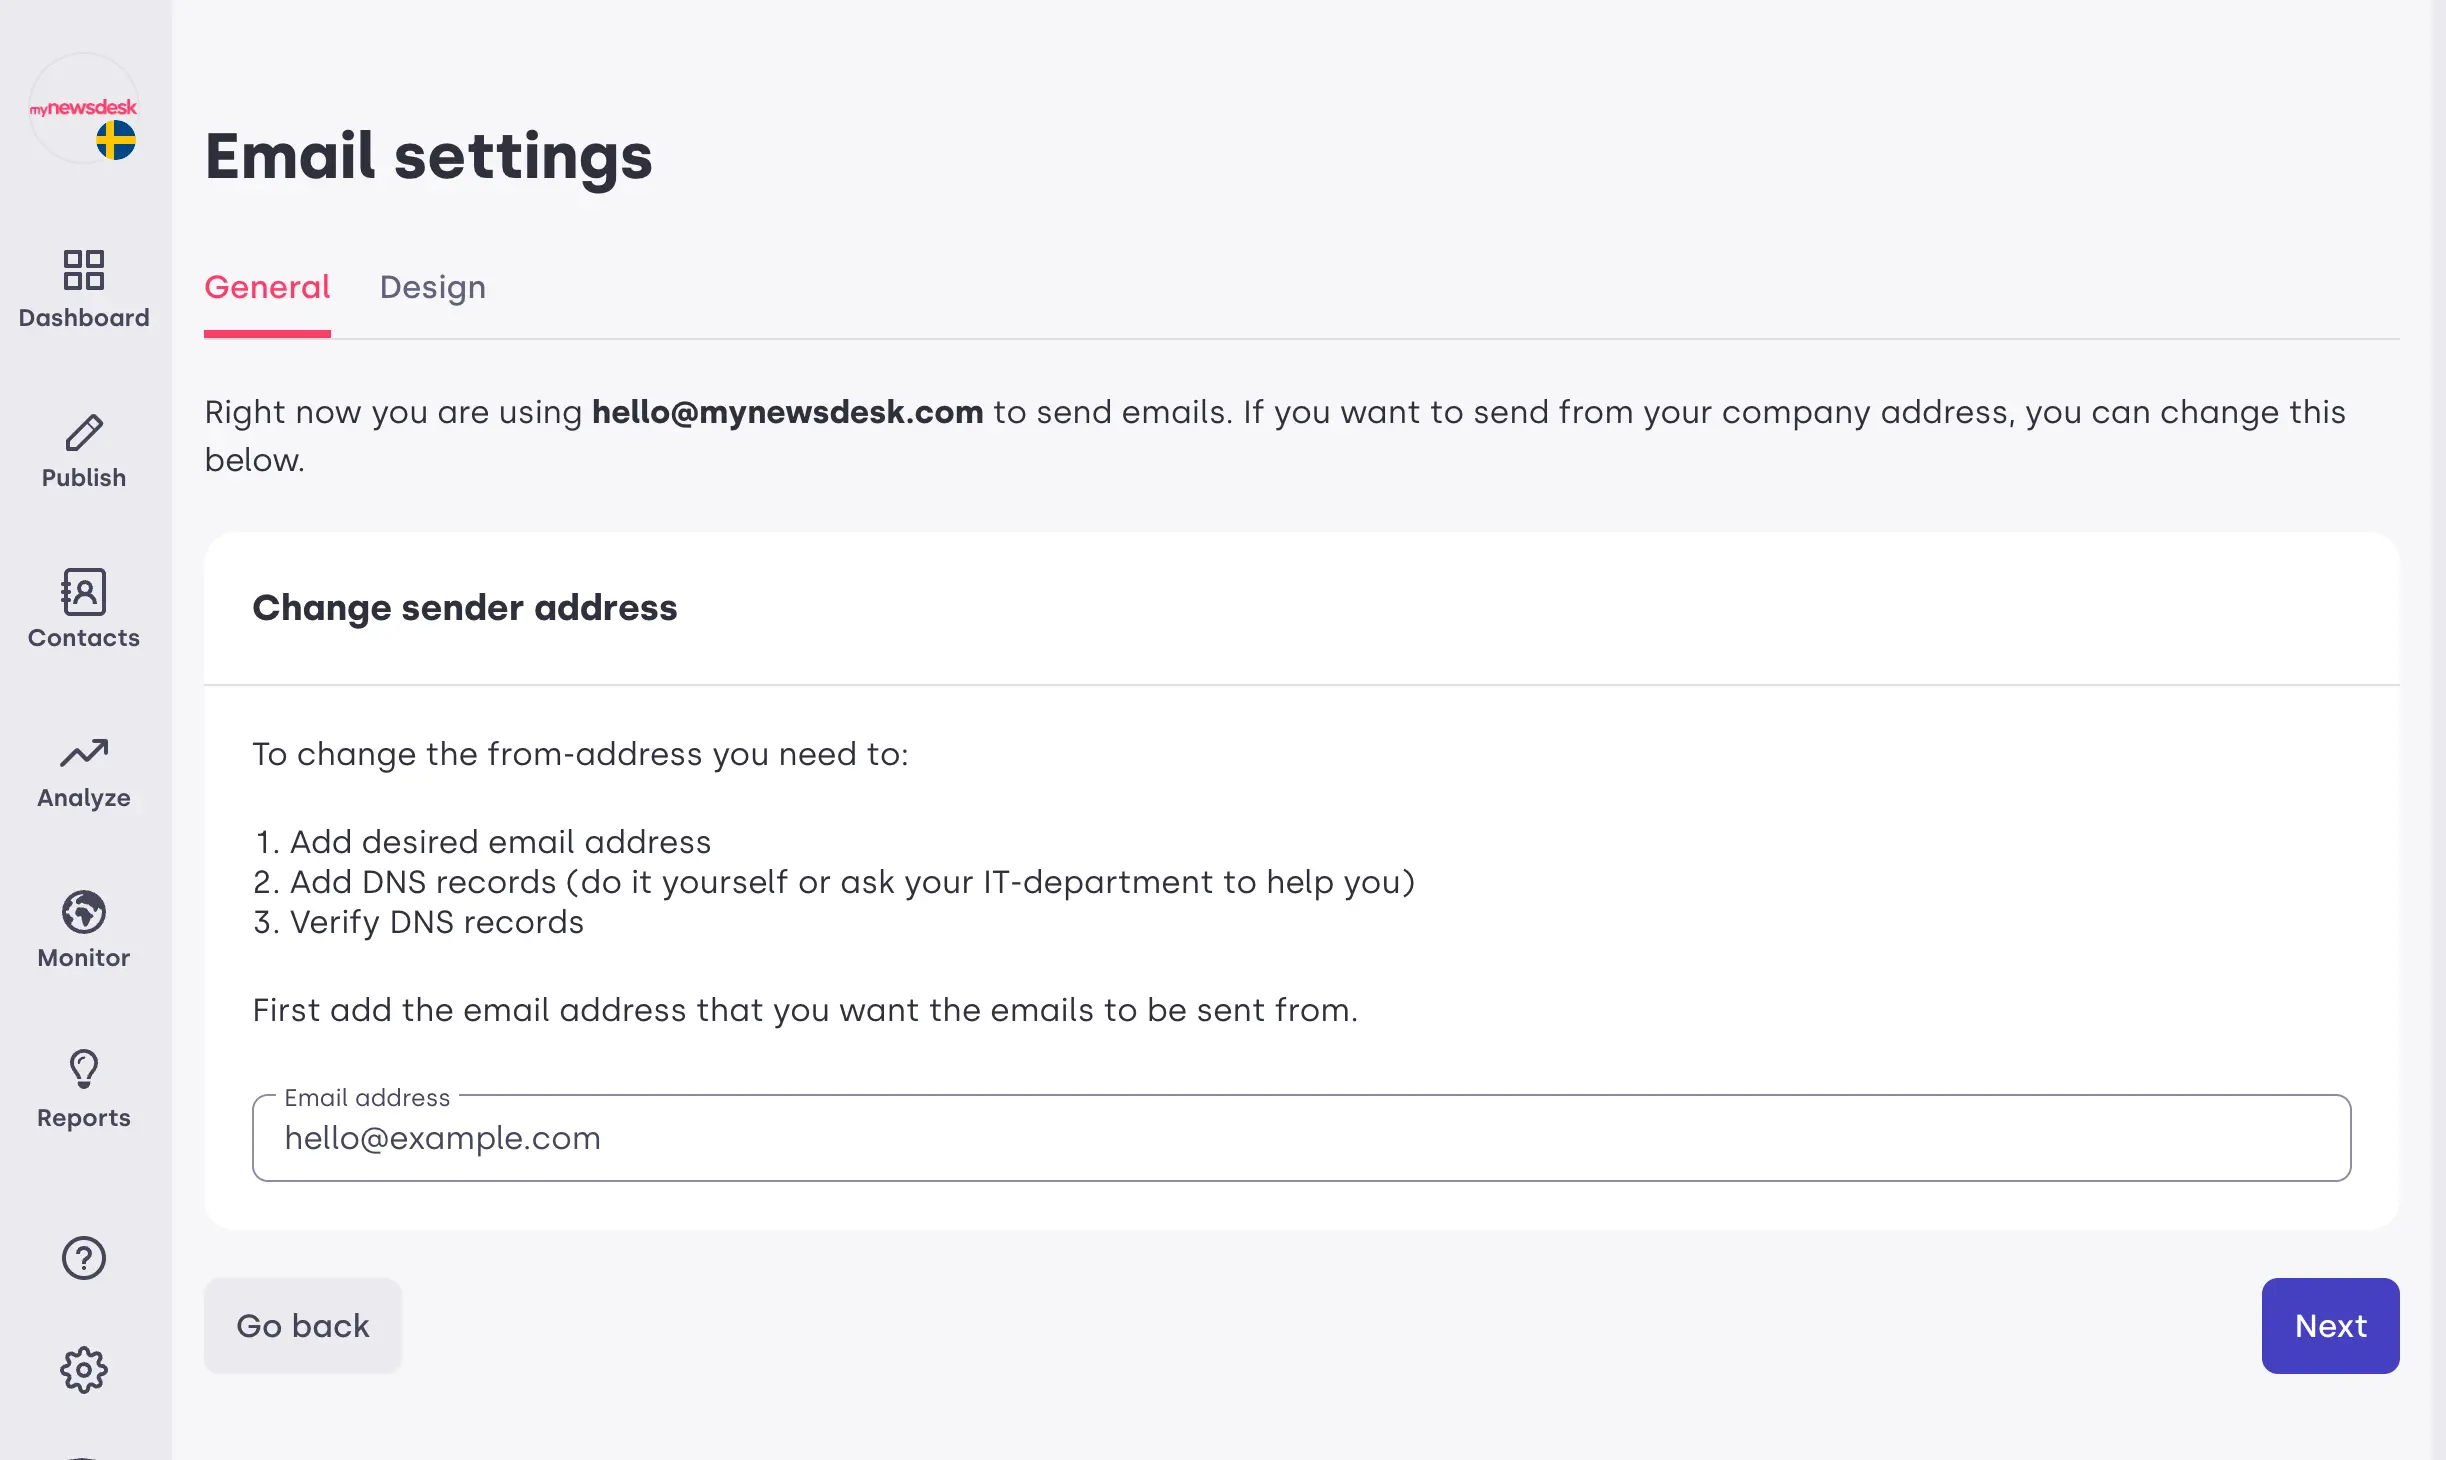
2. Enter the email you would like to use
The domain of the email address will be used for the DNS setup in the next step.

3. Configure and verify your DNS settings
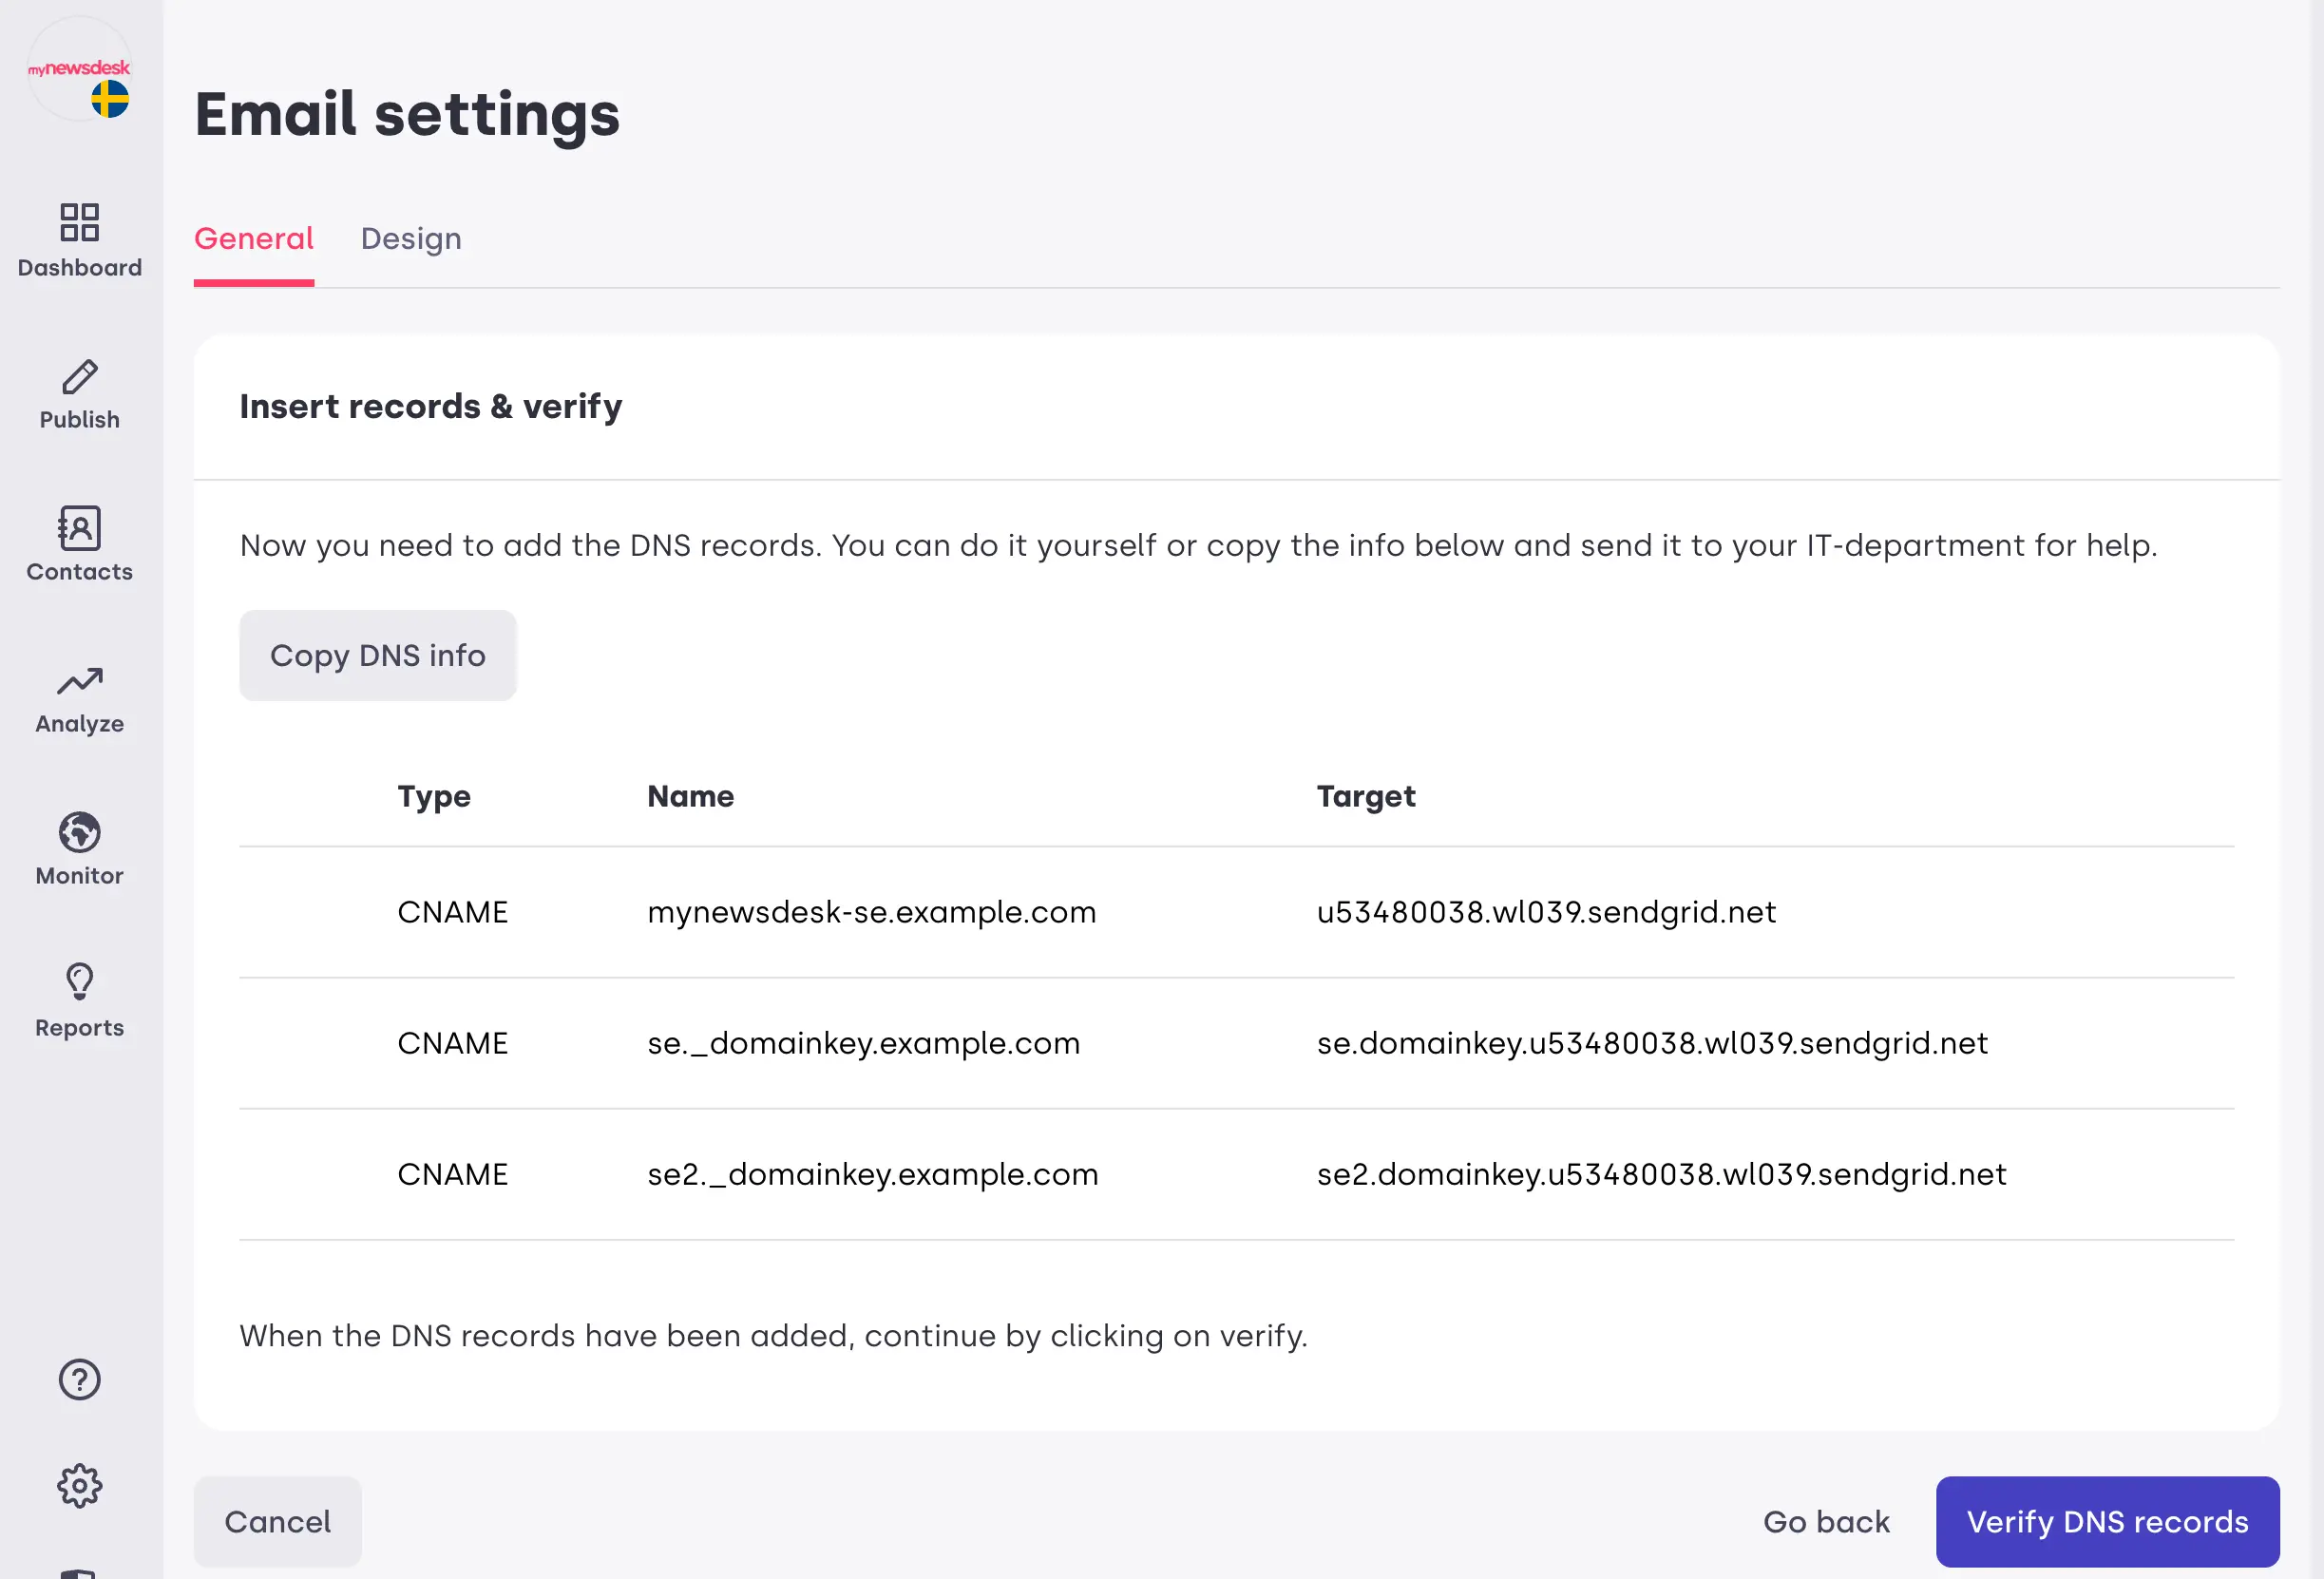
On the final step you will see a list of DNS records that must be added to your domain. If you do not have administrative rights to your domain yourself you may use the “Copy DNS info” button and paste the information into a message to your company IT-department.
After the DNS entries have been added, click the “Verify” button to validate that the records are correct. If any of the records fail to validate, please double check that the record names and targets matches our list. If they are correct but the validation is still failing you may have to wait and try again later since DNS settings can take time to propagate across the internet.
